Stepping outside into a blinding glare or a pitch-black garden path ruins your home’s evening charm immediately. Thoughtful illumination transforms your yard into an inviting sanctuary while boosting nighttime security and curb appeal.
Many homeowners install fixtures haphazardly without considering light angles, beam spreads, or landscape growth. These common exterior lighting mistakes can leave your house looking like an airport runway or an interrogation compound.
You can easily upgrade your setup by avoiding fundamental planning and installation errors. Let us examine the design fixes that will elevate your outdoor lighting ideas and highlight your architecture beautifully.
Mistake 1: Creating an Airport Runway with Path Lights
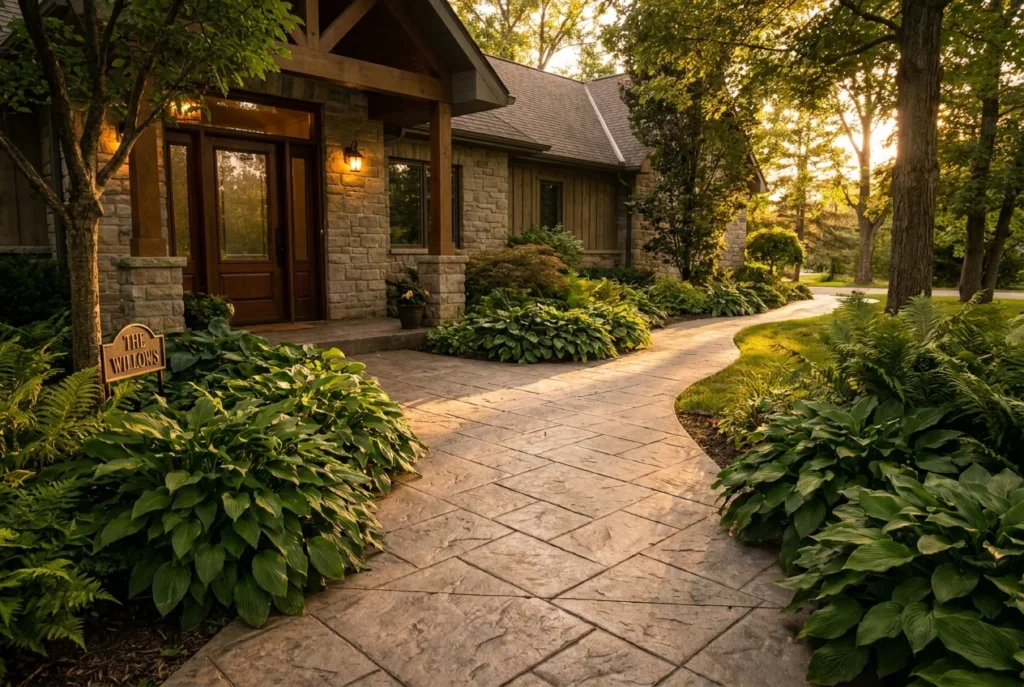
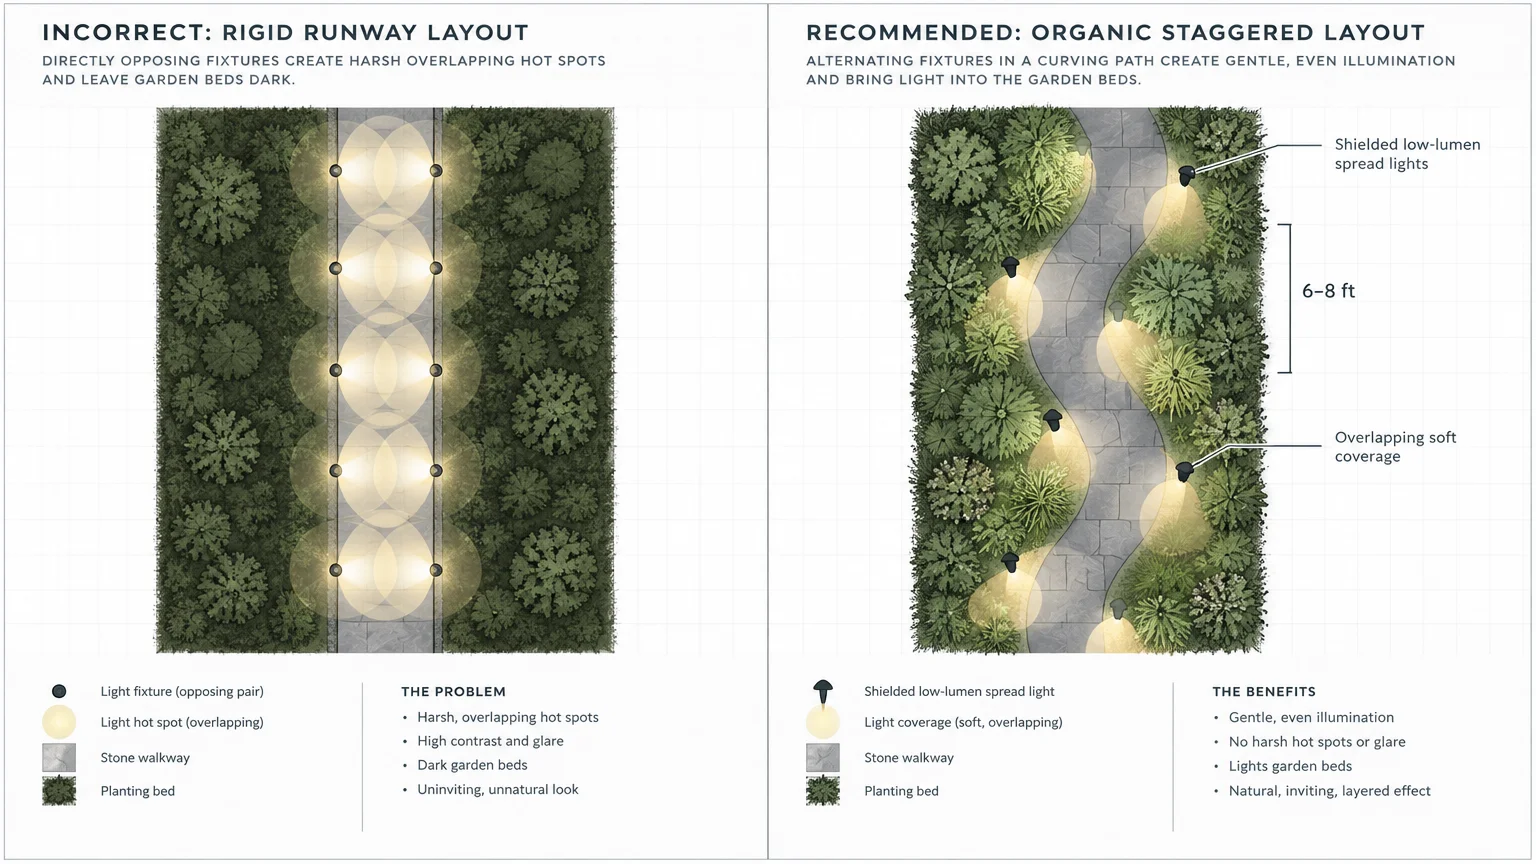
Staggering path lights on alternating sides creates balanced, continuous illumination without forming a runway. Many homeowners line both sides of a walkway with identical fixtures in rigid, parallel rows.
This symmetrical layout draws attention to glowing light fixtures rather than your landscape. It produces distracting bright spots on the pavers while leaving surrounding planting beds in total darkness.
Instead, set fixtures six to eight feet apart within organic planting beds along the walkway. Use low-lumen spread lights directed downward to cast gentle pools of overlapping light.
Selecting path fixtures with solid top caps shields your eyes from direct bulb glare. The cap forces light downward onto the walking surface where you need it most.
Downlighting from overhead tree branches or architectural eaves offers an even more natural alternative. Designers refer to this technique as moonlighting because it casts soft, dappled shadows across hardscape surfaces.
Mistake 2: Selecting the Wrong Color Temperature
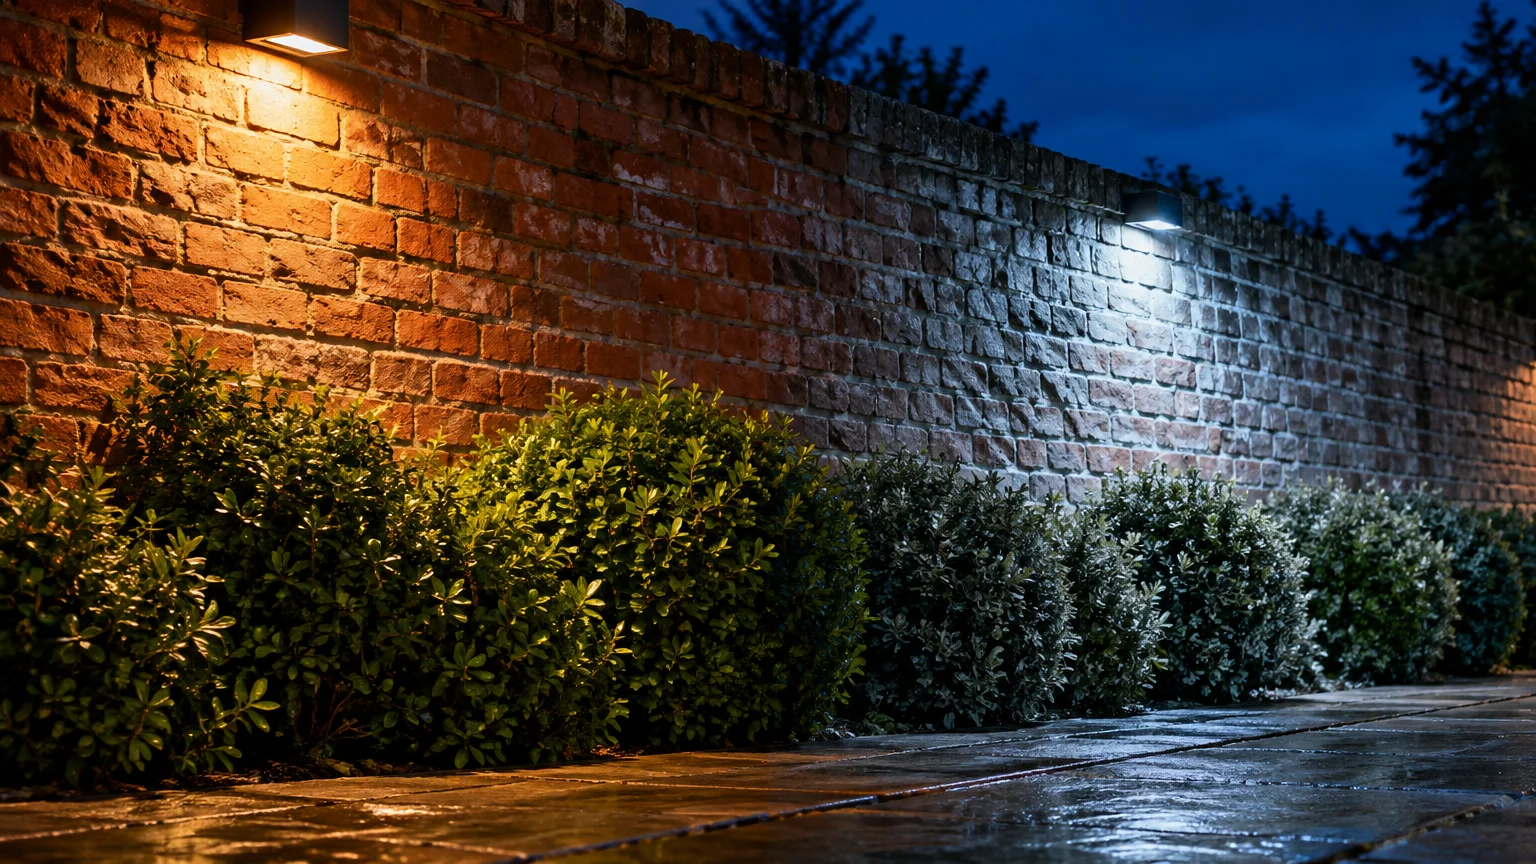
Light color sets the emotional tone of your property after dusk. Cold, bluish illumination creates an unwelcoming, sterile mood that feels commercial or institutional.
For warm and inviting curb appeal lighting, select LEDs rated between 2700K and 3000K. Warm white light mimics golden-hour sunlight, enhancing brickwork, wood siding, and rich green foliage.
Cool white light above 4000K makes foliage look sickly, pale, and unnatural. It also washes out the organic warmth of stone walkways and earth-toned building materials.
Pay close attention to the Color Rendering Index (CRI) rating on bulb packaging as well. Choose fixtures with a CRI of 80 or higher to reveal the authentic, vibrant colors of your garden flowers.
Consult architectural galleries on Houzz to see how cohesive color temperatures unify facades. Mixing different Kelvin ratings across your front yard creates distracting visual chaos.
Mistake 3: Directing Blinding Glare into Human Eyes
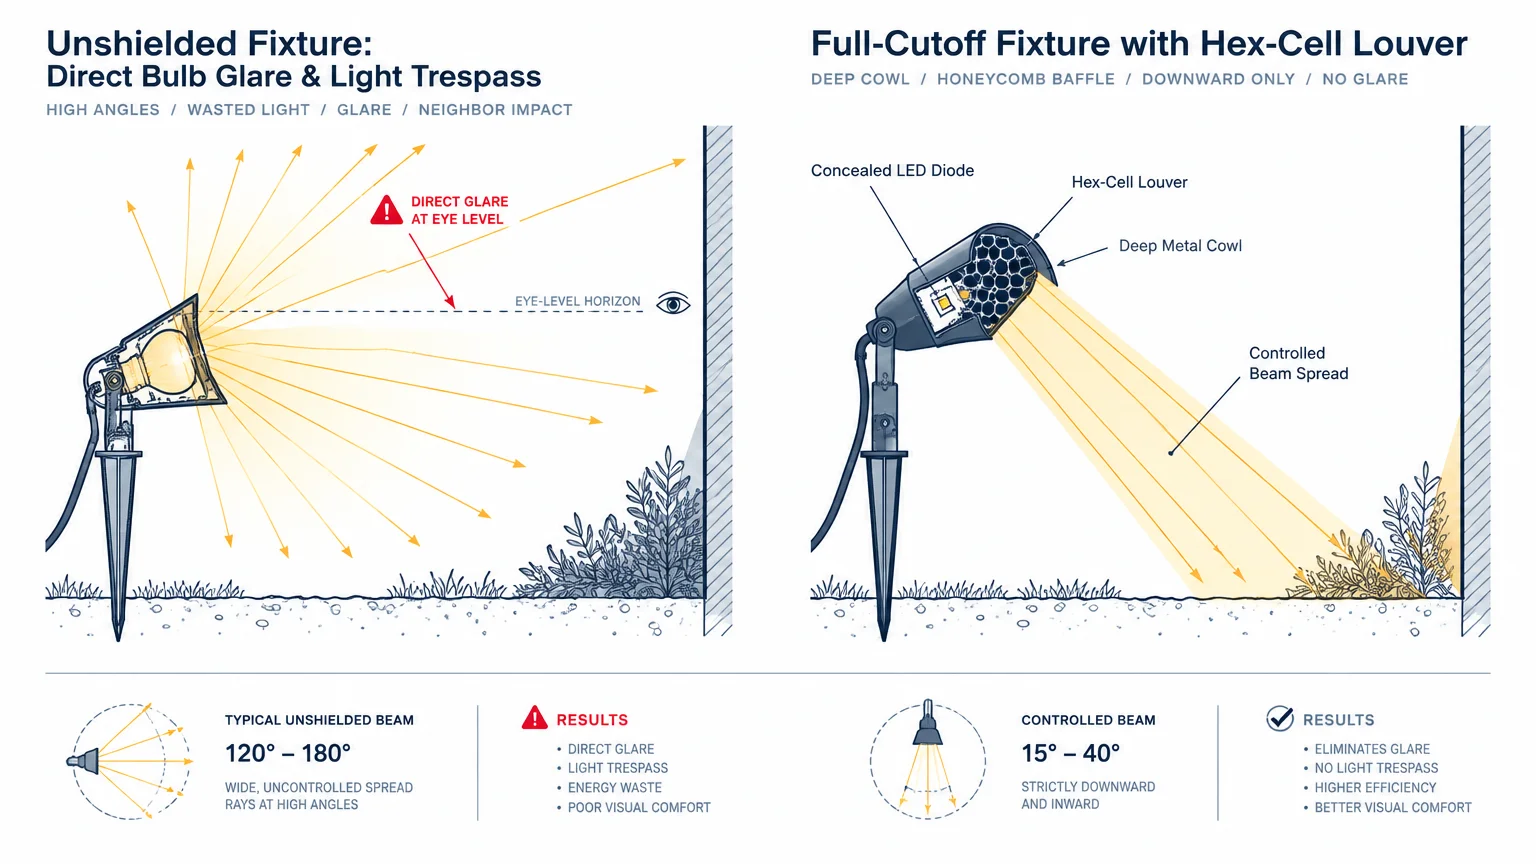
High-intensity light bulbs without proper shields cause intense eye fatigue and discomfort. Nothing ruins an outdoor evening gathering faster than an exposed bulb shining directly into a guest’s eyes.
Position every exterior fixture so observers see the illuminated target rather than the light source itself. Use full-cutoff fixtures, deep cowls, or hex-cell louvers to conceal raw LED diodes.
Unshielded uplighting also scatters stray light upward into the atmosphere. This wasted illumination washes out the night sky and disturbs local wildlife rhythms.
Extension specialists at PennState Extension emphasize shielded landscape fixtures to protect nocturnal pollinators and migratory birds. Shielding keeps light focused precisely where human activity requires it.
Angle directional spotlights away from patios, driveways, and neighboring windows. Aim beams inward toward garden walls or specimen trees to capture reflected, glare-free ambience.
Mistake 4: Overlooking Wet Versus Damp Safety Ratings
Outdoor light fixtures endure severe weather shifts, sprinkler spray, and ambient moisture. Installing an indoor or improperly rated fixture outdoors invites dangerous electrical shorts and rapid corrosion.
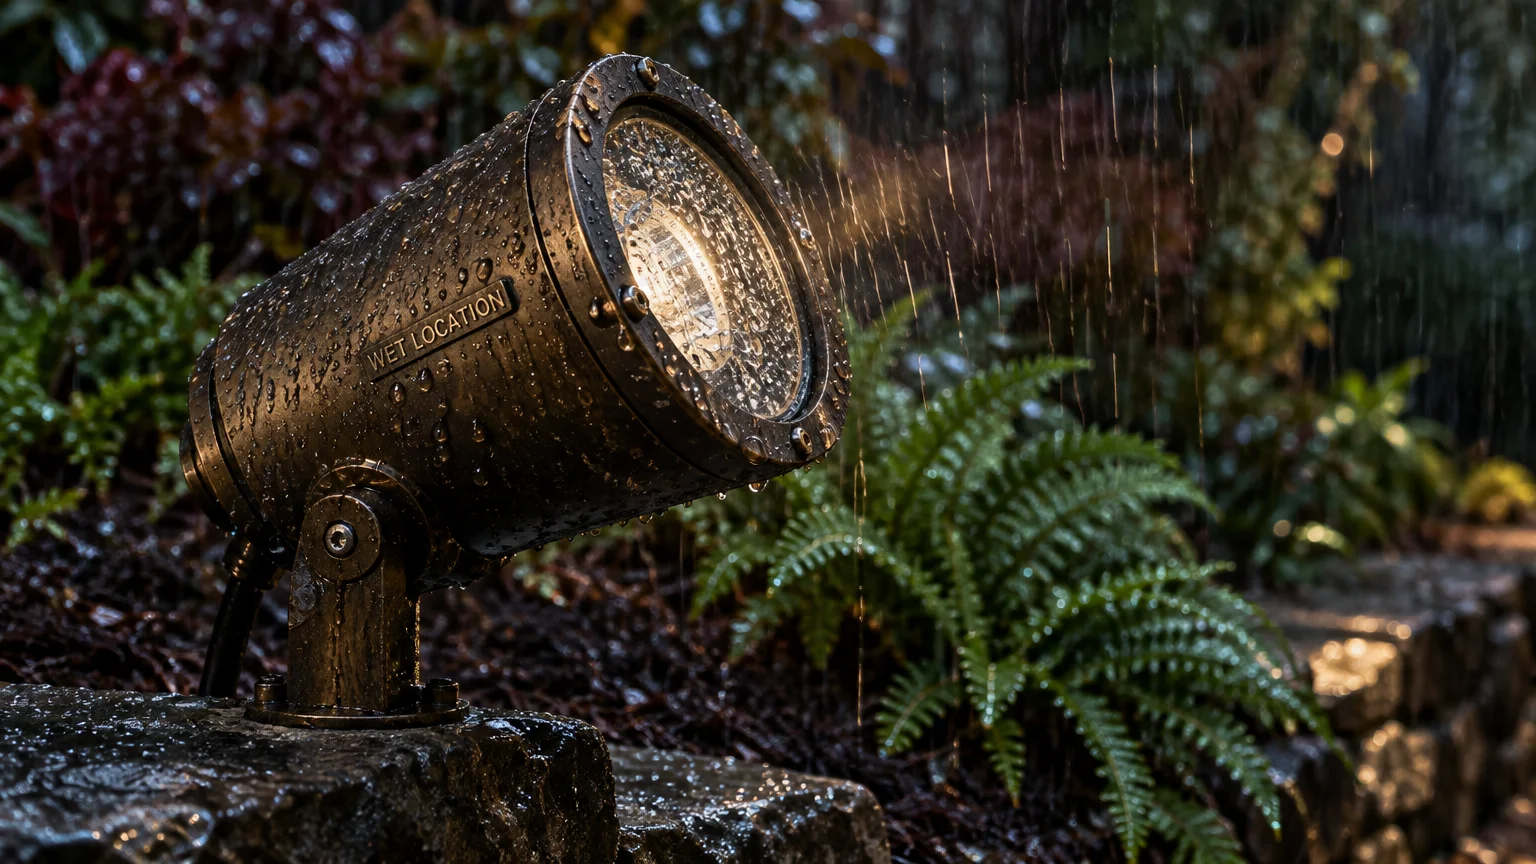
Underwriters Laboratories (UL) categorizes exterior fixtures into damp-rated and wet-rated models. Damp-rated fixtures belong solely under covered structures like open porches, porticos, or gazebos where direct water never penetrates.
Any fixture exposed directly to rain, snow, or irrigation heads requires a certified wet rating. Wall sconces on exposed siding, post lamps, and ground path lights must carry this designation.
Check ingress protection (IP) ratings on landscape fixtures if UL ratings are not listed. Look for an IP65 or higher rating to ensure complete protection against dust ingress and low-pressure water jets.
Quality manufacturing materials also matter in humid climates. Solid brass and copper fixtures naturally resist salt spray and moisture far better than painted aluminum or plastic.
Mistake 5: Over-Illuminating and Flattening the Landscape
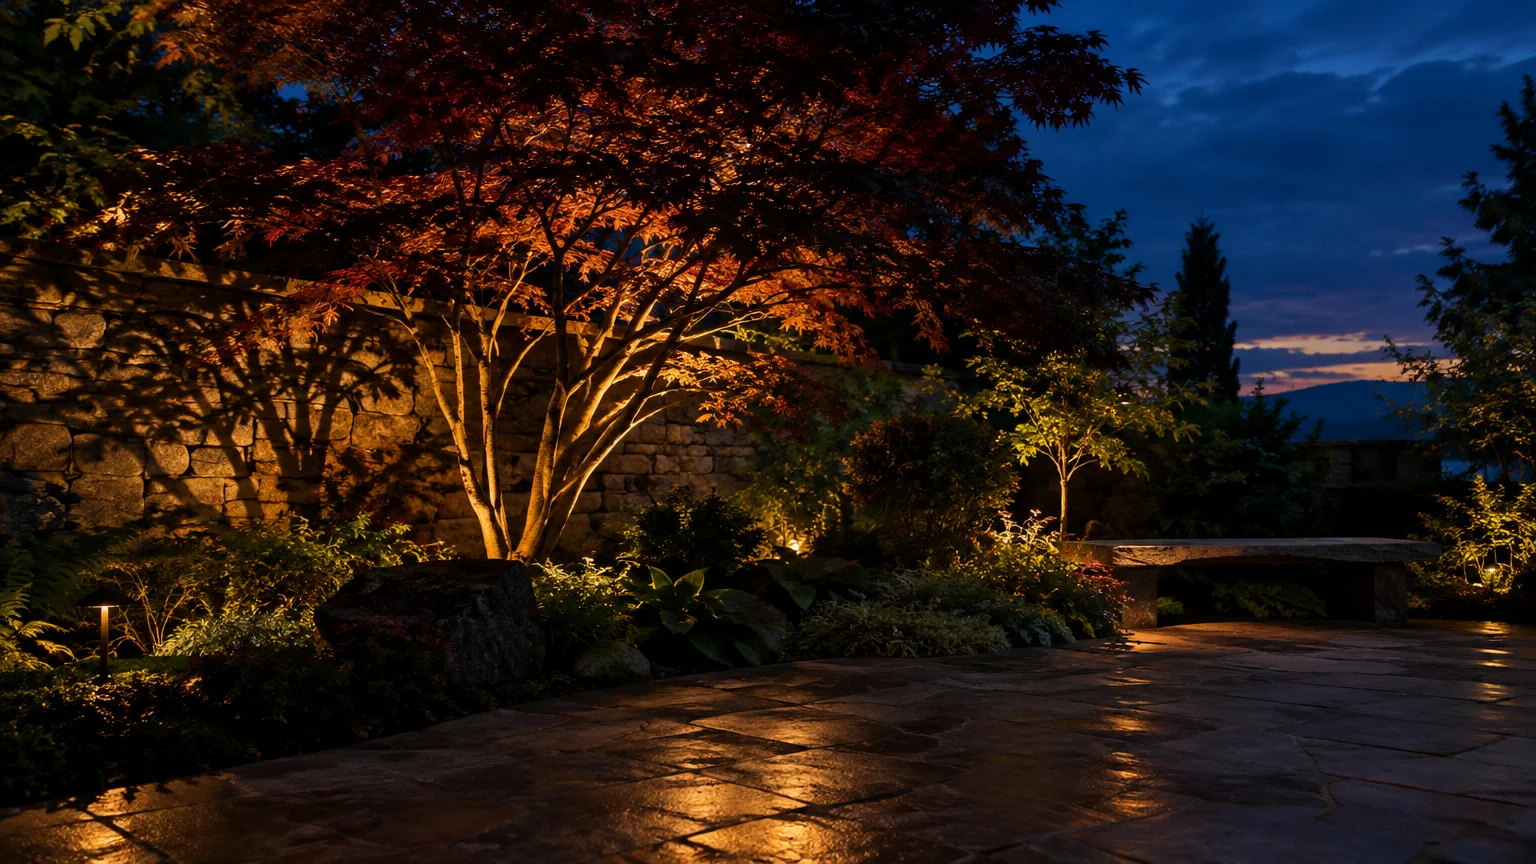
Darkness serves as the essential canvas upon which outdoor lighting operates. When you illuminate every square foot of your property, you flatten spatial depth and erase textural drama.
Successful landscape lighting tips prioritize shadow just as much as brightness. Contrast allows architectural columns, stone retaining walls, and sculptural branches to stand out with three-dimensional elegance.
Keep lumen counts modest across decorative garden beds. A low-wattage spotlight with a narrow beam delivers significantly more visual impact than a sprawling floodlight.
Choose fixtures certified by ENERGY STAR to reduce electrical consumption while delivering precisely calibrated output. Lower wattage creates comfortable ambiance while trimming monthly utility bills.
Use grazing techniques by placing narrow-beam spotlights close to textured stone walls. Grazing casts dramatic vertical shadows that showcase the rugged masonry work.
Mistake 6: Neglecting Plant Growth and Canopy Spread
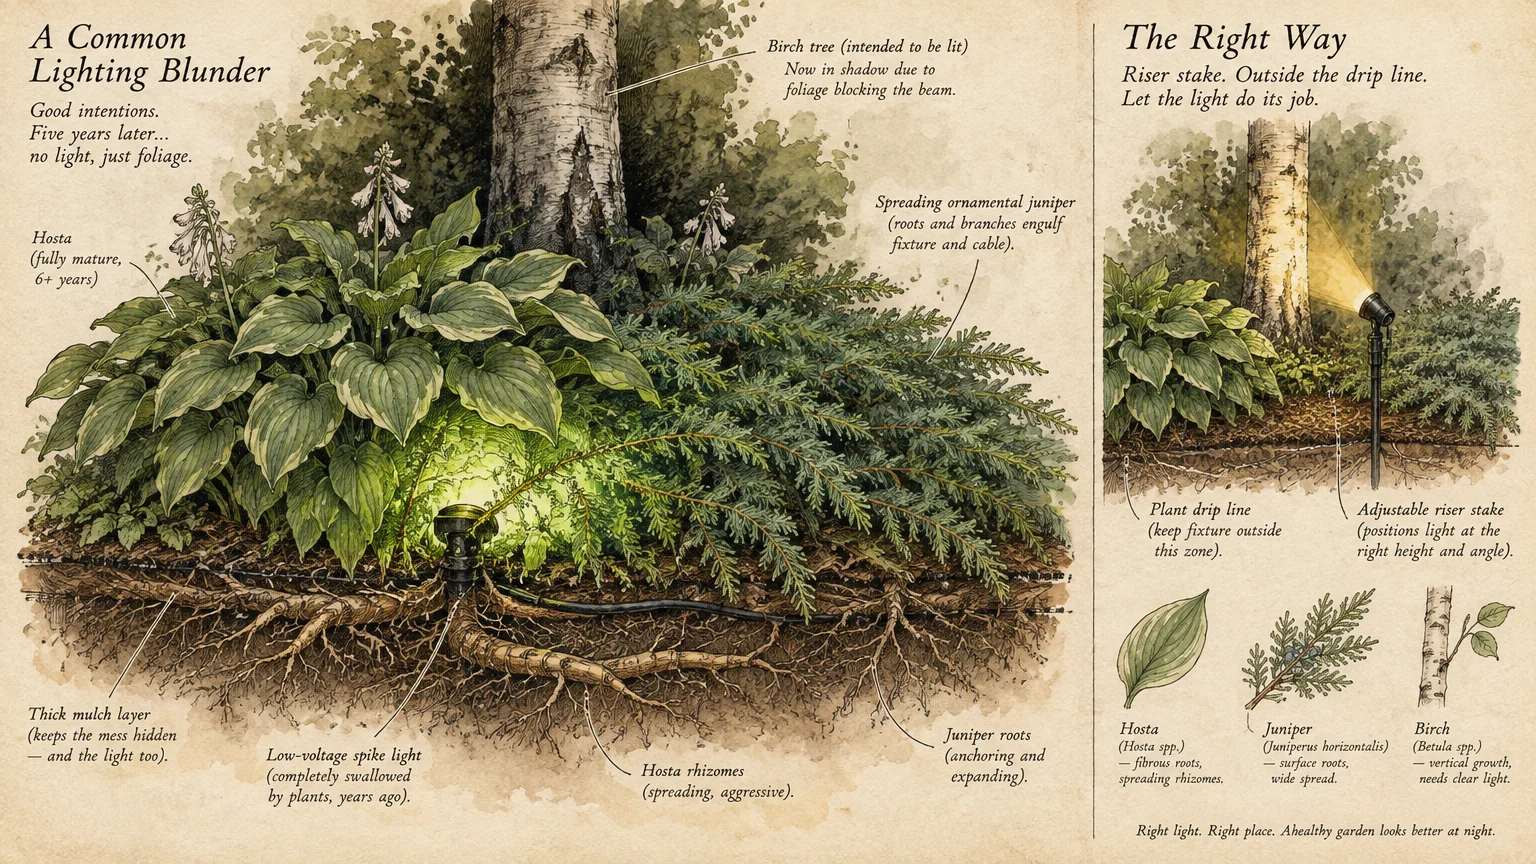
Placing uplights flush against young tree trunks creates severe maintenance headaches within a few seasons. As trunks thicken and surface roots expand, they can heave fixtures and crush buried electrical wire.
Expanding foliage canopies also redirect light beams over time. A spotlight aimed at a young sapling’s branch structure will eventually shine uselessly into dense bottom growth.
Leave several feet of coiled slack cable inside junction boxes and around fixture bases. This extra wire allows you to relocate fixtures outwards as shrubs and specimen trees expand.
As gardening pioneer Gertrude Jekyll famously reflected on landscape stewardship:
“A garden is a grand teacher. It teaches patience and careful watchfulness; it teaches industry and thrift.” — Gertrude Jekyll
Inspect your garden illumination seasonally to prune encroaching branches that block fixture lenses. Routine care protects your plants from fixture heat while preserving your intended lighting composition.
Hand-dig trenches near mature root zones to protect tree vitality. Severing major structural roots with mechanical trenchers can weaken trees and stunt canopy growth.
Mistake 7: Treating Security Lighting Like Ambient Illumination
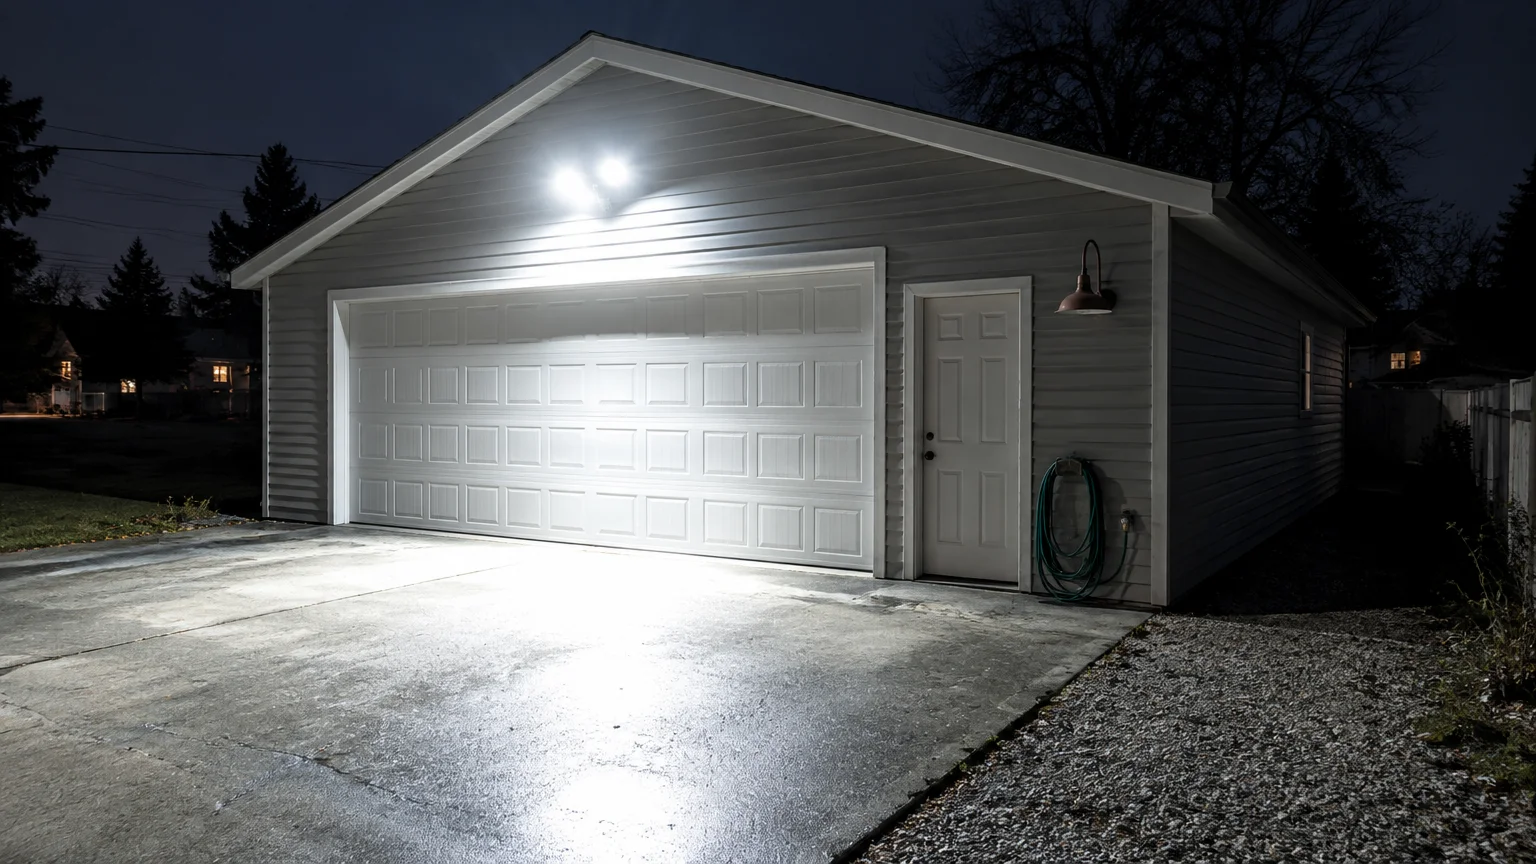
Blasting high-powered security floodlights throughout the entire night makes your property look like a commercial storage yard. It blinds neighbors, washes out garden aesthetics, and destroys nighttime tranquility.
Security lighting functions best when paired with dual-sensor motion detectors. These units stay dark until movement triggers them, alerting you immediately to potential intruders.
For everyday evening enjoyment, rely on layered low-voltage lighting instead. A gently illuminated perimeter eliminates shadowy blind spots naturally without blinding anyone walking up your driveway.
Pairing smart motion sensors with warm ambient ground lighting delivers security and sophistication. You gain clear nighttime visibility without sacrificing welcoming curb appeal.
Mount security fixtures high enough to prevent tampering while angling them strictly downward onto property entryways. Never aim floodlights directly into adjacent yards or oncoming street traffic.
Mistake 8: Choosing the Wrong Scale for Porch Lighting
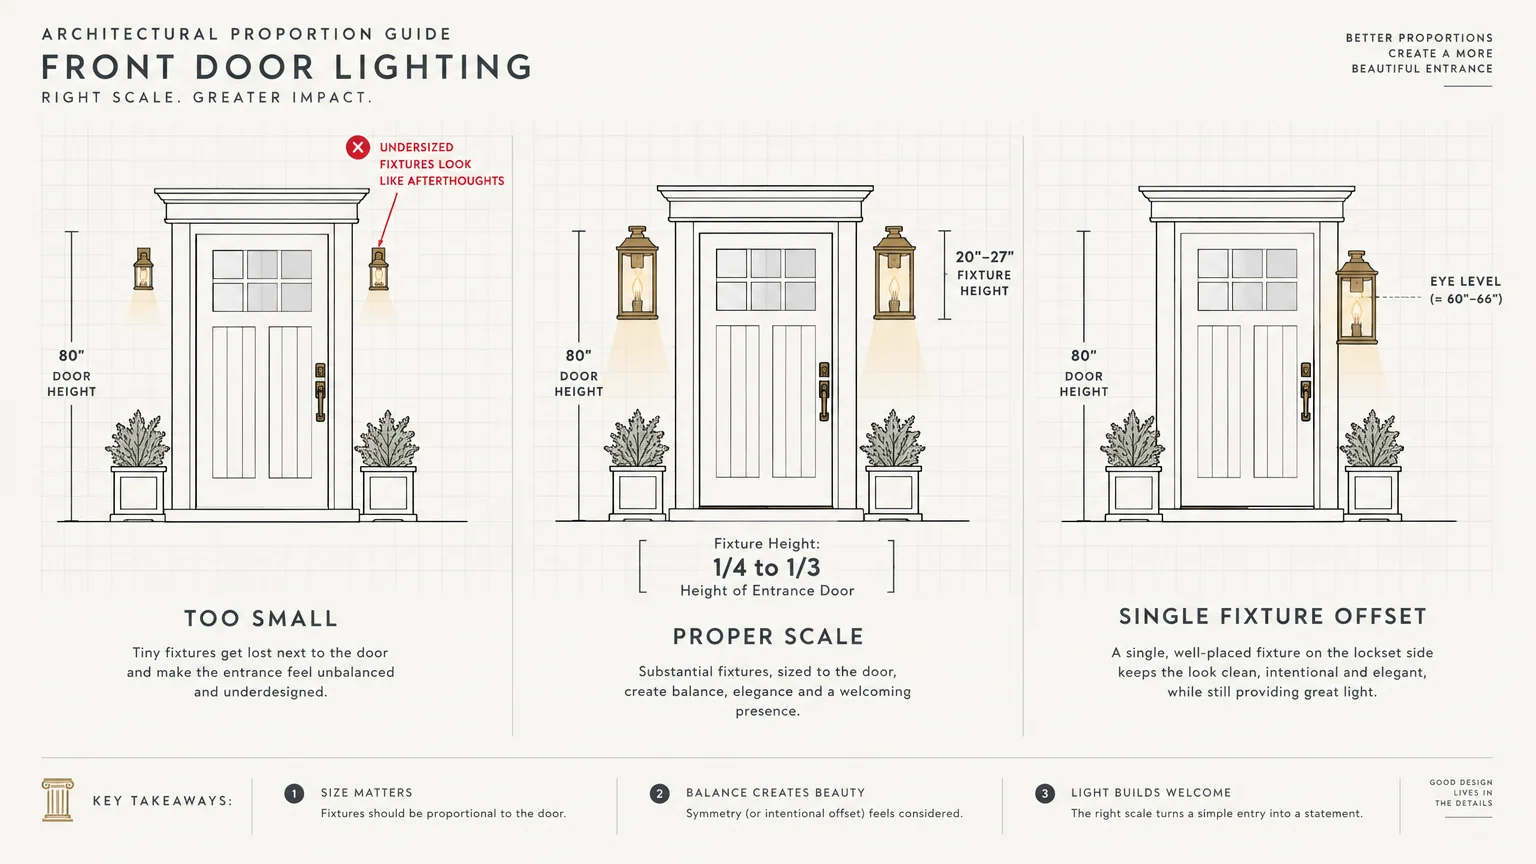
Porch lighting serves as the primary visual anchor for your home’s exterior entrance. Homeowners frequently purchase undersized sconces that appear comically tiny next to substantial front doors.
When installing a single entryway lantern, choose a fixture that measures one-third the height of the door. If you mount paired sconces flanking the doorway, select fixtures measuring one-fourth the door’s height.
Mount your wall sconces so the light source sits near eye level, approximately 66 inches above the porch decking. Placing fixtures too high casts deep facial shadows on standing guests.
For covered porches with high ceilings, consider adding a central hanging pendant fixture. Ensure the bottom of any hanging lantern hangs at least seven feet above the porch floor for head clearance.
Proper proportions establish balanced symmetry and provide safe visibility around entry locksets and steps. Review installation guides on This Old House for step-by-step mounting advice.
Mistake 9: Wiring Everything to a Single Control Zone
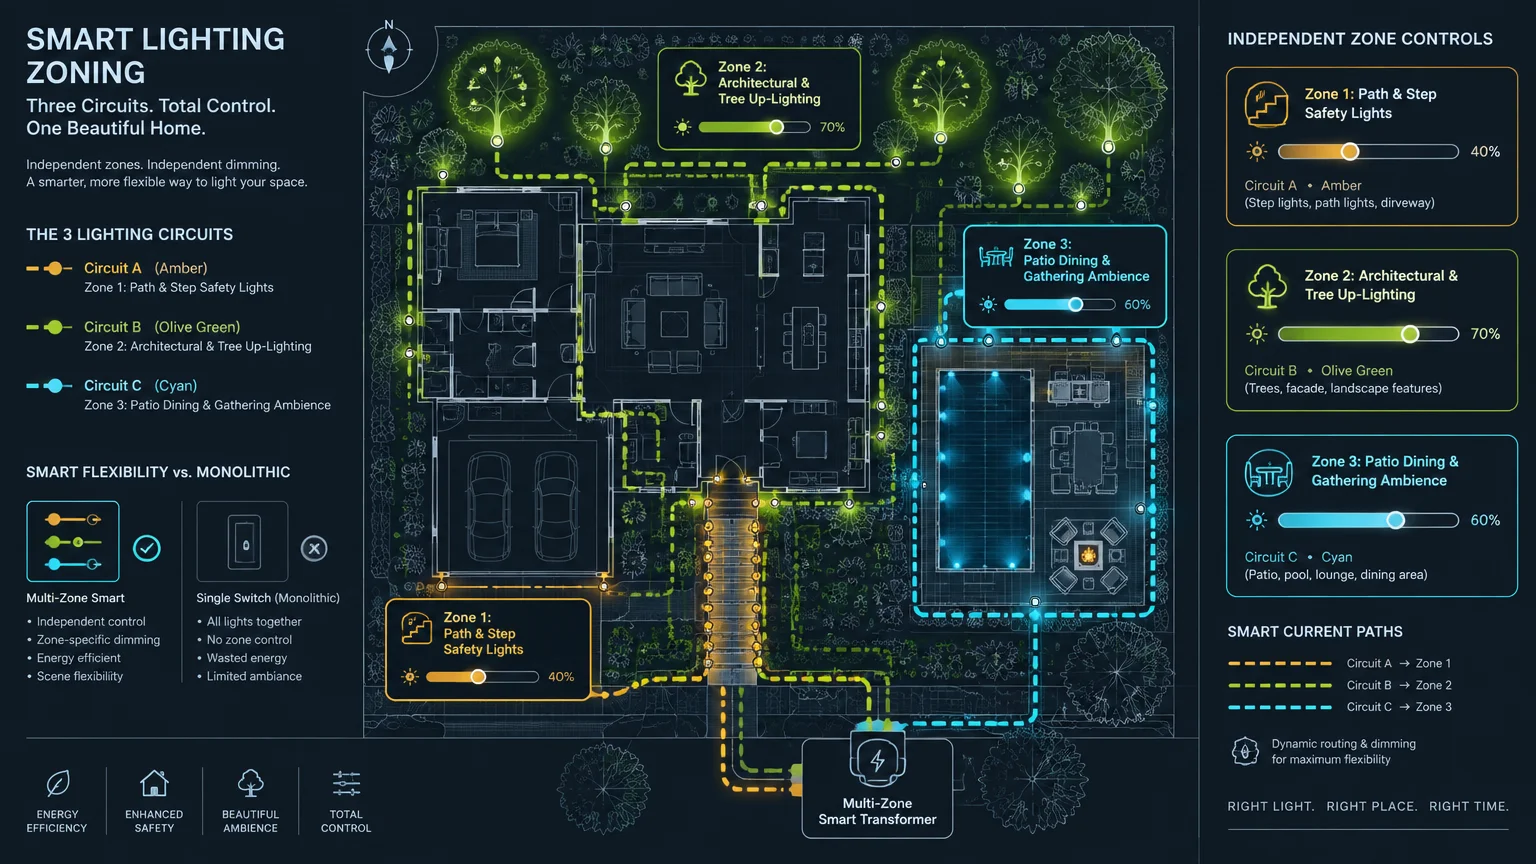
Connecting all exterior fixtures to a single master wall switch restricts your lighting versatility. You lose the ability to adapt lighting levels for outdoor dinners, quiet evenings, or security needs.
Divide your landscape lighting system into multiple dedicated circuits or smart control zones. Keep architectural uplighting, functional path lights, and patio dining illumination on independent circuits.
Size your transformer to handle future expansion by adding 20 percent headroom above your calculated wattage load. Operating a transformer at maximum capacity causes voltage drops and shortens equipment life.
Smart transformers and astronomical timers automatically adjust runtime based on seasonal sunset changes. You can turn off decorative tree lighting at midnight while leaving security pathways illuminated until sunrise.
Incorporate dimmers into patio and deck zones to soften brightness during outdoor meals. Dimmable circuits let you transition seamlessly from bright task lighting to cozy ambient glow.
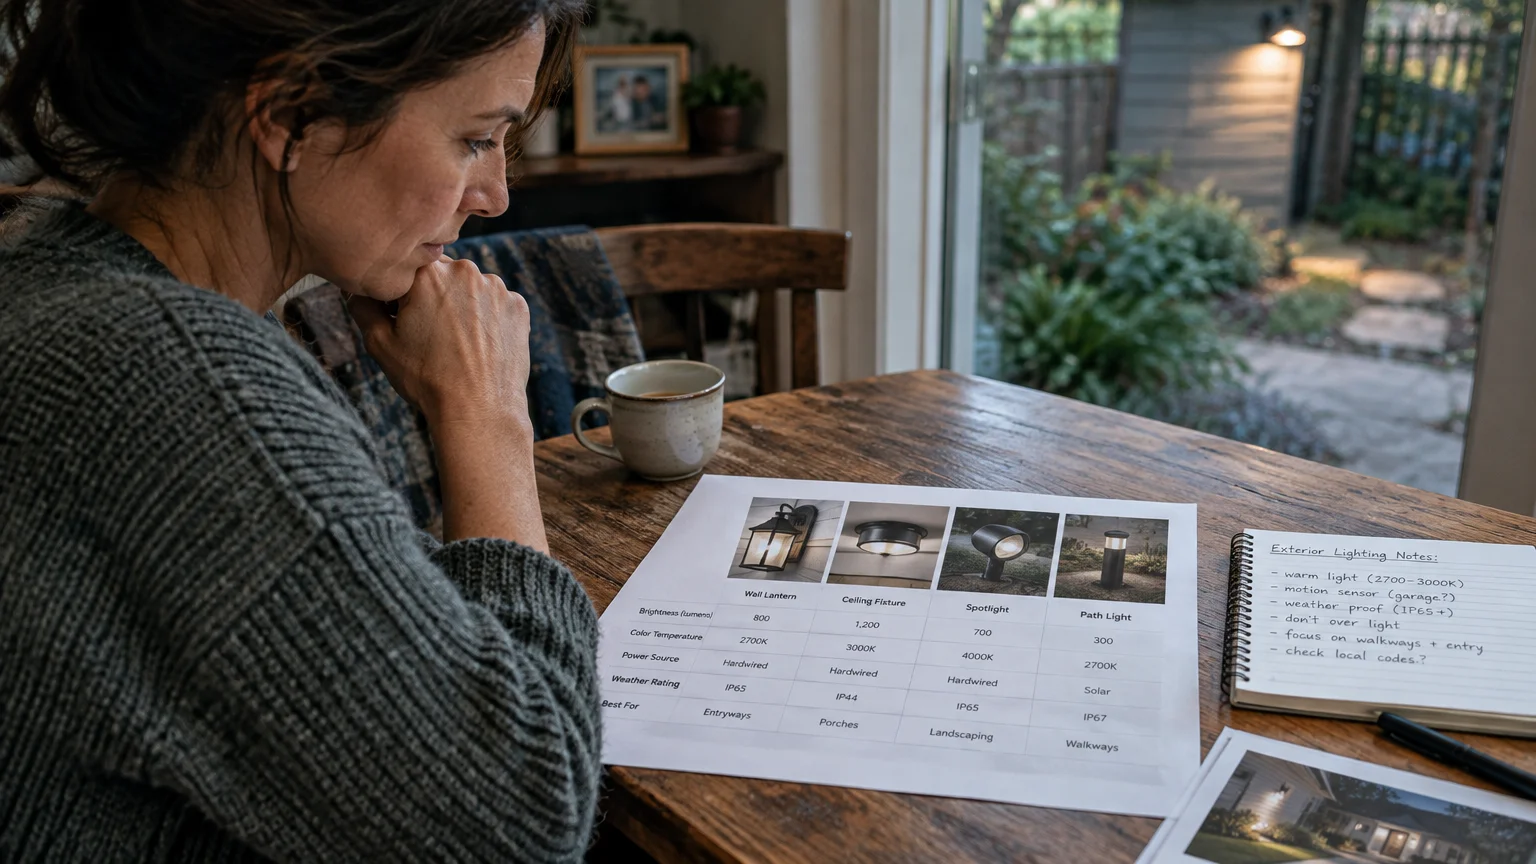
Exterior Lighting Specifications: Quick Comparison Guide
Selecting the right balance of lumens, color temperature, and weather protection ensures long-term performance. Use this quick reference guide to match each exterior location with ideal technical specifications.
| Lighting Application | Recommended Lumens | Color Temperature (K) | UL Rating | Design Purpose |
|---|---|---|---|---|
| Walkway & Path Lights | 100 – 200 lm | 2700K – 3000K | Wet Location | Safe foot travel without runway glare |
| Landscape Uplighting | 200 – 400 lm | 2700K – 3000K | Wet Location | Tree canopies and architectural textures |
| Front Porch Sconces | 300 – 700 lm | 2700K | Damp or Wet Location | Entryway focal point and guest greeting |
| Deck & Step Lights | 50 – 100 lm | 2700K – 3000K | Wet Location | Trip prevention on elevation transitions |
| Motion Security Floods | 1,000 – 2,000 lm | 3000K – 4000K | Wet Location | Targeted perimeter monitoring and alert |
Following these target specifications prevents common installation mismatches across your yard. Matching fixture ratings to exposure levels protects your wiring and keeps illumination balanced.
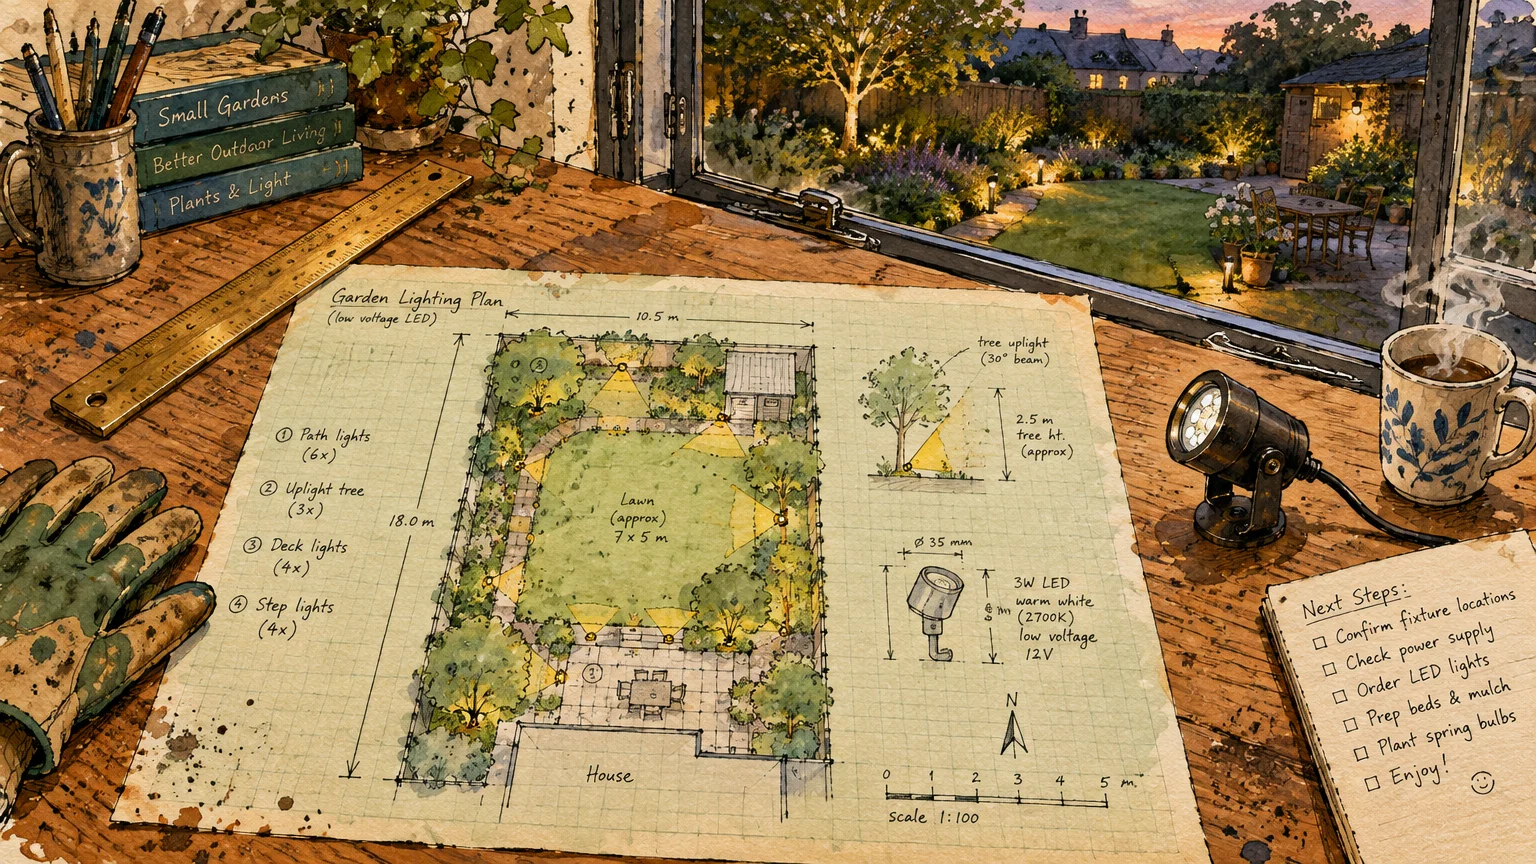
Best Practices for Planning Your Lighting Layout
Creating a cohesive outdoor design requires thoughtful layering across multiple heights. Incorporate these practical layout principles to elevate your outdoor lighting ideas effectively:
- Focus on key structural assets such as specimen trees, water features, and stone columns.
- Layer three core tiers: ambient ground glow, functional task lighting, and architectural highlights.
- Conceal fixture hardware within low shrubs, ground covers, or masonry recesses.
- Stagger fixtures along organic landscape contours rather than rigid straight lines.
- Test your fixture placement at night using temporary battery-powered lamps before trenching.
Temporary night testing helps you spot dark patches and glare angles before you dig trenches. A dry run saves hours of labor and avoids unnecessary wiring adjustments later.
When It’s Worth the Investment
While straightforward low-voltage fixtures make wonderful DIY weekend projects, certain scenarios warrant hiring a licensed electrical contractor. High-voltage 120-volt wiring requires direct burial conduits, permit inspections, and specialized trenching.
Investing in professional installation is particularly smart when extending power beneath driveways or around swimming pool borders. Licensed pros understand regional electrical codes and guarantee watertight, properly grounded connections.
Premium architectural installations also justify investment in commercial-grade solid brass or copper fixtures. These heavy-gauge materials withstand decades of fertilizer exposure, soil moisture, and harsh winter road salt.
Mature tree canopies requiring canopy-mounted downlights often demand professional climbing gear and specialized hardware. Tree-safe mounting brackets allow trunks to expand without damaging the tree or wiring.
Professional designers also calibrate line losses across lengthy wire runs using multi-tap transformers. Proper voltage balancing ensures fixtures at the end of a run burn just as brightly as those close to the transformer.
Frequently Asked Questions
How many total lumens do I need for my front yard?
Most residential front yards need between 1,500 and 3,000 total lumens spread across all fixtures. Spreading modest output through multiple low-lumen fixtures creates balanced lighting without harsh hot spots.
What is the difference between line-voltage and low-voltage lighting?
Line-voltage operates on standard 120-volt household current and requires sealed conduit pipes buried deep underground. Low-voltage systems use a transformer to drop power to 12 volts, making installation safe and DIY-friendly.
How do I stop outdoor lights from attracting swarms of insects?
Choose warm LED bulbs rated at 2700K or lower, since insects are drawn to blue and ultraviolet wavelengths. Full-cutoff fixtures that direct illumination downward also minimize airborne swarms near seating areas.
Can landscape uplights harm tree bark or disrupt plant growth?
Low-voltage LED fixtures produce minimal heat and will not scorch tree trunks or delicate foliage. However, ensure fixtures never touch expanding root collars or constrict growing branches over time.
Elevate Your Evening Curb Appeal
Take a walk around your property tonight with a flashlight to evaluate your current setup. Identify fixtures that cast harsh glare or leave pathways dark, and adjust your layout gradually.
By eliminating these nine common exterior lighting mistakes, you create a captivating, secure landscape that enhances your home all evening. Plant care requirements vary by climate, soil, and growing conditions. Always confirm plant toxicity with your veterinarian if you have pets or young children.
Last updated: February 2026. Plant care guidance reflects current horticultural best practices—always observe your specific plant’s signals.