
A dripping faucet or a slightly soft spot on your bathroom floor might seem like minor inconveniences you can ignore until next season, but delayed home maintenance quietly drains your bank account. Procrastinating on small fixes allows moisture, pests, and weather to transform twenty-dollar weekend projects into massive structural renovations. Catching foundational wear, roof leaks, and plumbing vulnerabilities early protects your biggest financial investment while giving you unparalleled peace of mind. By spending a few hours tackling these seven essential home repairs today, you intercept disaster before it strikes. Whether you wield the caulk gun yourself or hire a qualified professional, proactive maintenance remains the ultimate strategy to save thousands and keep your living space completely safe.
The Hidden Cost of Ignoring Minor Roof Damage
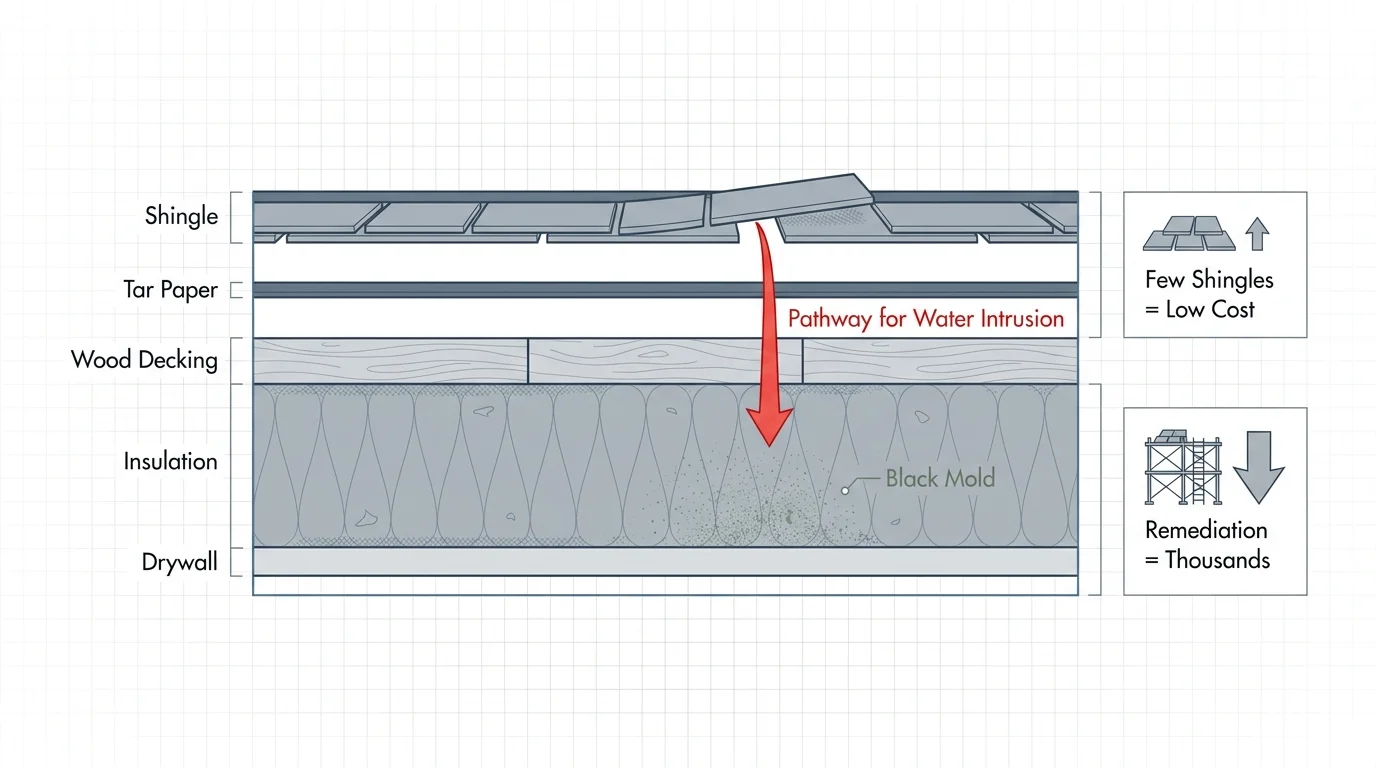
Your roof is your home’s primary armor against the elements; even a single compromised shingle provides a direct pathway for water intrusion. When howling winds or a severe hailstorm loosen a shingle, the underlying tar paper and wood decking become exposed to rain. Over time, that moisture seeps into your attic, saturating your insulation and eventually blooming into black mold on your ceiling drywall.
Replacing a few torn shingles or resealing cracked flashing around your chimney costs very little in materials. However, if you wait until water visibly drips through your living room ceiling, you are looking at replacing roof decking, wet insulation, and drywall—not to mention paying for professional mold remediation.
Grab a pair of binoculars twice a year and inspect your roof from the ground. Look for lifted edges, missing granules, or damaged metal flashing around vents. If you spot an anomaly and feel comfortable on a ladder, apply roofing cement to seal minor lifting. When replacing shingles, prioritize personal safety; always use a harness system on steep pitches or call a professional roofer.

Sealing Windows and Doors to Prevent Energy Drain
Drafty windows and doors are silent thieves, steadily driving up your heating and cooling bills month after month. Beyond the immediate energy loss, compromised window seals invite moisture into your wall cavities. When condensation builds up on poorly insulated sills, it eventually rots the wooden frames and surrounding drywall. Interestingly, these drafts also wreak havoc on your indoor gardening efforts—many popular tropical houseplants will drop their leaves if subjected to the cold winter air seeping through an unsealed window frame.
According to the experts at ENERGY STAR, sealing leaks and adding proper insulation can save homeowners up to 15 percent on heating and cooling costs. The remedy is highly actionable: spend a Saturday afternoon applying fresh weatherstripping to your door frames and running a neat bead of exterior-grade caulk around your window perimeters.
- The Candle Test: Hold a lit candle near your window seams on a windy day. If the flame dances, you have a draft that needs sealing.
- Clear Weep Holes: Check the exterior bottom track of your sliding windows. The small rectangular weep holes allow rainwater to escape; if they are clogged with debris, water pools and rots the interior sill.
- Upgrade Hardware: Ensure window locks engage tightly. The locking mechanism physically pulls the sashes together, creating an airtight seal.
Re-Caulking Showers and Tubs Before Water Escapes
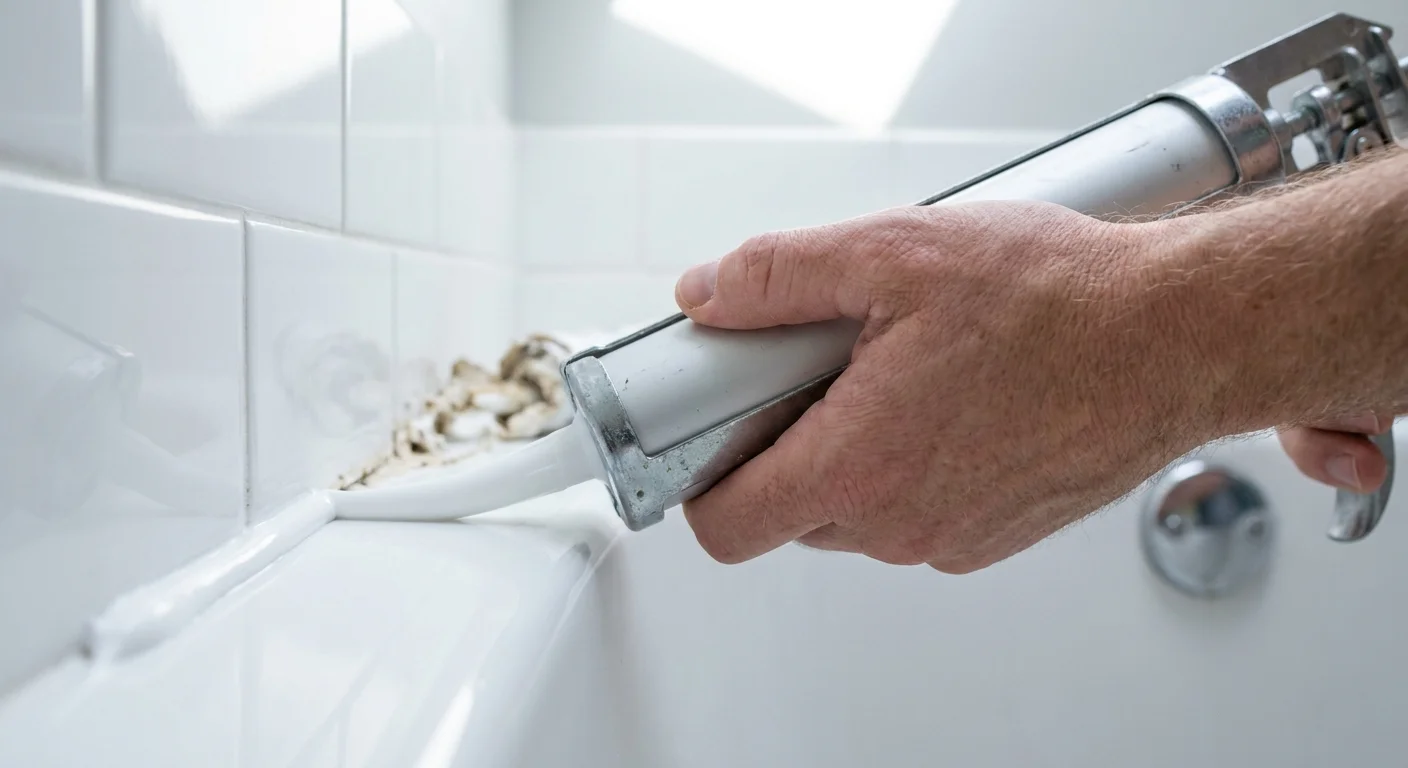
Few areas in your home experience as much daily moisture as the bathroom. The flexible caulk joining your bathtub to your tile wall serves as the sole barrier preventing water from cascading into your wall cavity. When caulk ages, it shrinks, dries out, and cracks. Even a hairline fracture allows water to wick behind the tile, saturating the backer board and steadily rotting the wooden floor joists beneath your tub.
Repairing water-damaged floor joists and replacing custom tile work easily runs into the thousands. Conversely, a tube of high-quality, 100-percent silicone caulk costs about ten dollars. For comprehensive guidance on bathroom maintenance, resources like This Old House recommend inspecting wet-area caulking annually and replacing it at the first sign of discoloration or peeling.
When you tackle this project, thorough preparation dictates your success. Never apply new caulk over old, failing caulk. The new material will not adhere properly, creating a false seal that traps moisture inside. Use a plastic scraper and caulk-softening gel to remove every trace of the old material. Wipe the joint with rubbing alcohol to eliminate soap scum, let it dry completely, and then apply your fresh silicone bead.
Clearing and Repairing Gutters and Downspouts
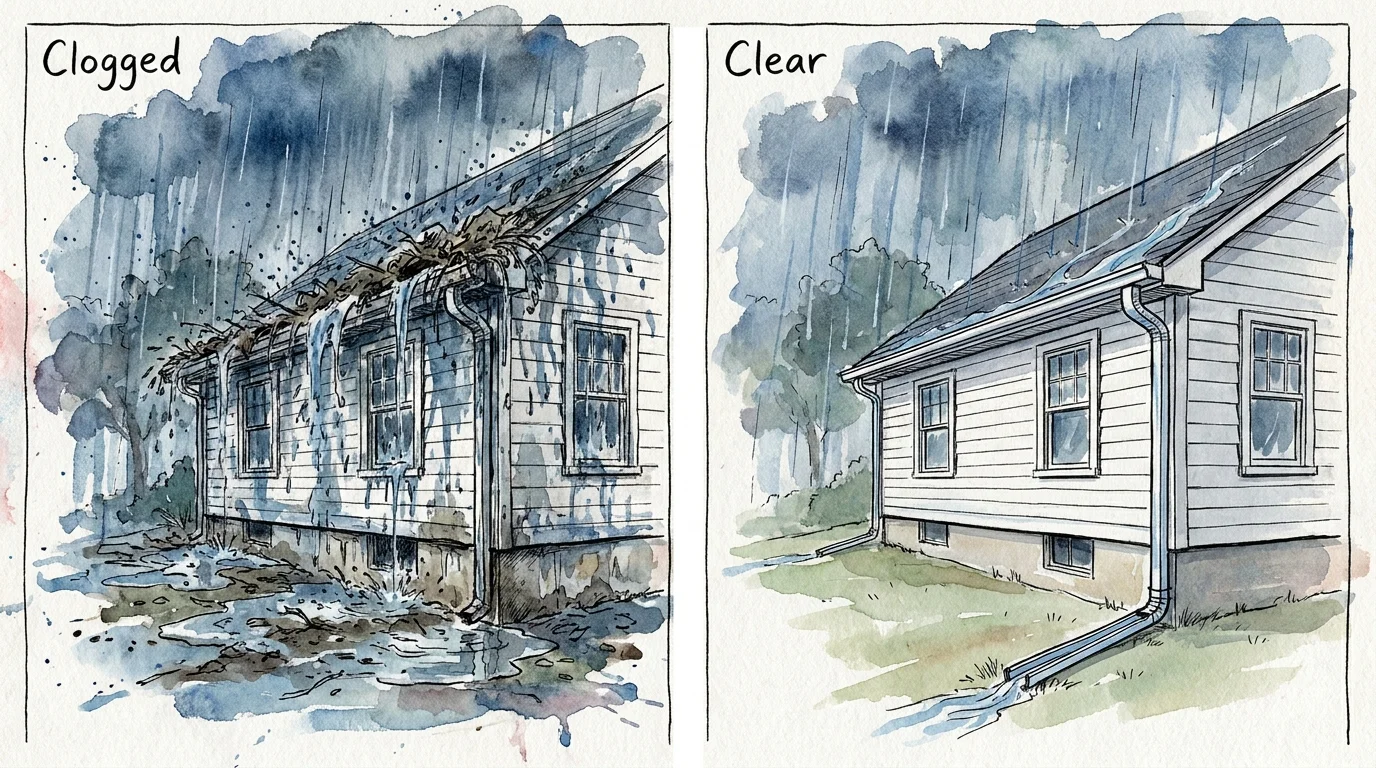
Gutters often go unnoticed until they look like a lush, unintended rooftop garden. While cascading water from a clogged gutter might look picturesque during a summer storm, it spells disaster for your home’s foundation and your surrounding landscape. Gutters exist to channel water away from the base of your home. When leaves and debris block that flow, water spills directly over the edge, pooling against your foundation walls.
This pooling water generates immense hydrostatic pressure. During colder months, this saturated soil freezes and expands, cracking concrete foundations with terrifying ease. Furthermore, overflowing gutters drown the expensive foundation shrubs and perennial beds planted near your home.
To avoid a catastrophic foundation repair bill, clean your gutters in the late fall after the trees drop their leaves, and again in the spring to clear out seed pods. Ensure your downspouts discharge water at least six feet away from the house. Adding an inexpensive corrugated plastic downspout extension is one of the smartest, cheapest investments you can make to protect your home’s structural integrity.
Fixing Minor Plumbing Leaks and Running Toilets
A toilet that constantly runs or a sink trap that occasionally drips might feel like background noise, but these plumbing anomalies are highly destructive. A running toilet is typically caused by a deteriorated rubber flapper valve inside the tank. This quiet leak can waste hundreds of gallons of water a week, resulting in staggering utility bills over a single year.
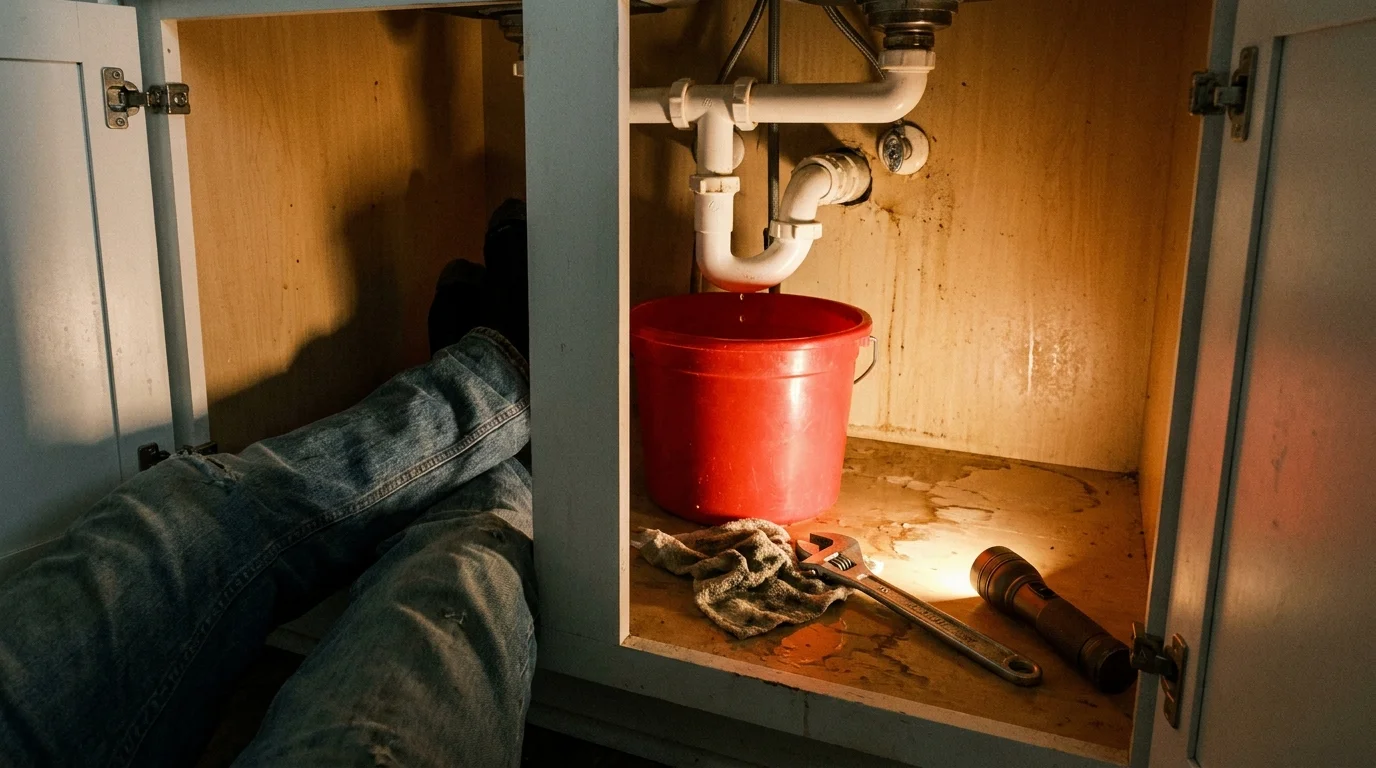
Under-sink leaks are equally insidious. A slow drip from a loose supply line or a deteriorated P-trap will saturate the bottom of your vanity cabinet. By the time you notice the warped wood or smell the distinct odor of mildew, you have lost the cabinet and potentially the flooring beneath it.
Swap out the flapper valve in your toilet—it requires no tools and takes three minutes. For your under-sink areas, place a dry paper towel beneath the plumbing pipes. Check it after a few days; if the paper towel is wrinkled or stained, you have an active leak that requires tightening or a new rubber gasket. Additionally, take this time to replace old rubber washing machine hoses with braided stainless steel lines. Burst washing machine hoses are a leading cause of catastrophic interior flooding.
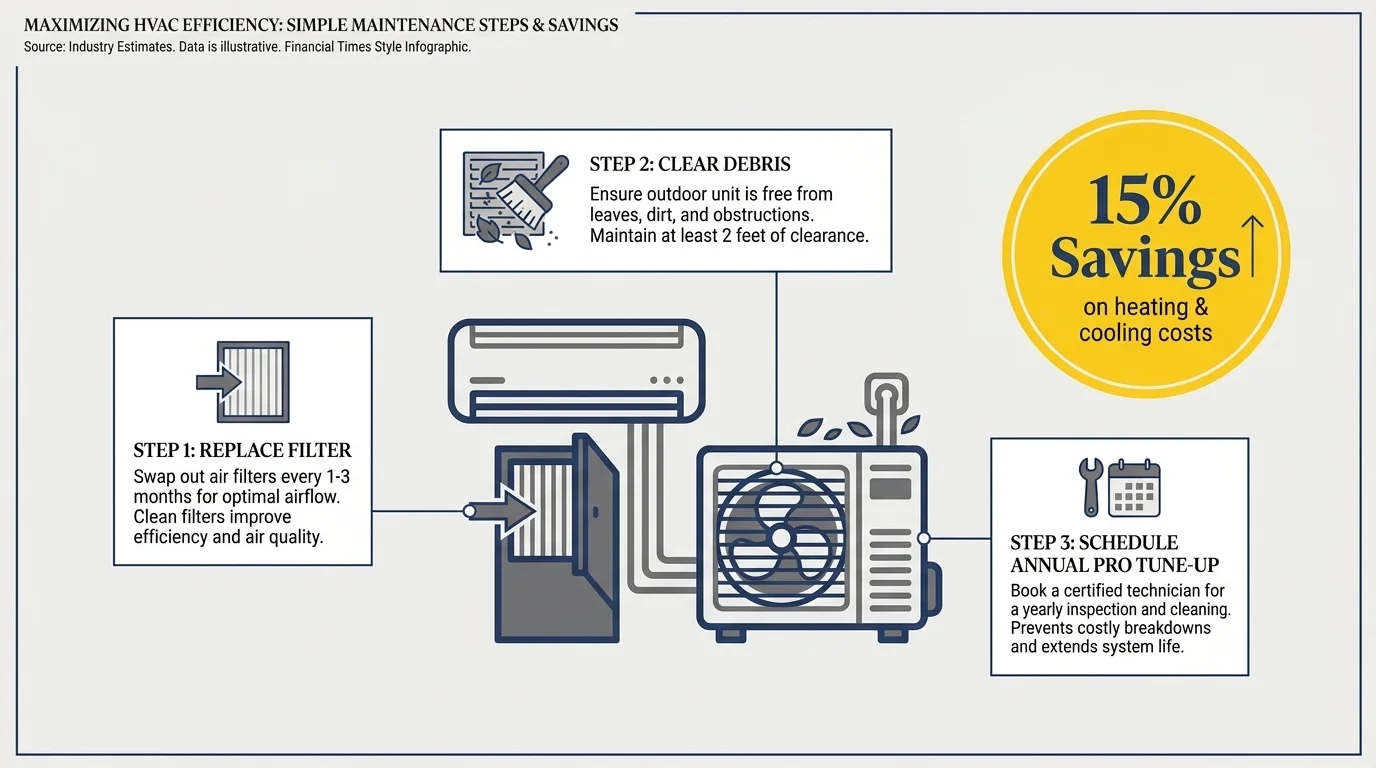
Servicing Your HVAC System
Your heating, ventilation, and air conditioning (HVAC) system is likely the most expensive mechanical equipment in your home. Forgetting basic maintenance drastically shortens its lifespan and reduces its efficiency. The most critical component of HVAC maintenance requires zero mechanical skill: changing the air filter.
When an air filter becomes clogged with dust, pet dander, and pollen, the blower motor has to work twice as hard to push air through your home. This excessive strain leads to premature motor failure and skyrocketing electricity bills. Set a recurring monthly alarm on your phone to check the filter, replacing it at least every ninety days—or more frequently if you have shedding pets or are running grow lights and fans for an extensive indoor plant collection.
Equally important is the condensate drain line. As your air conditioner pulls humidity out of the air, the water drips into a pan and drains outside. If this line clogs with algae, the pan overflows, often sending gallons of water through the ceiling below. Pouring a cup of white vinegar down the condensate drain pipe twice a year keeps the line clear and prevents extensive ceiling drywall replacement.
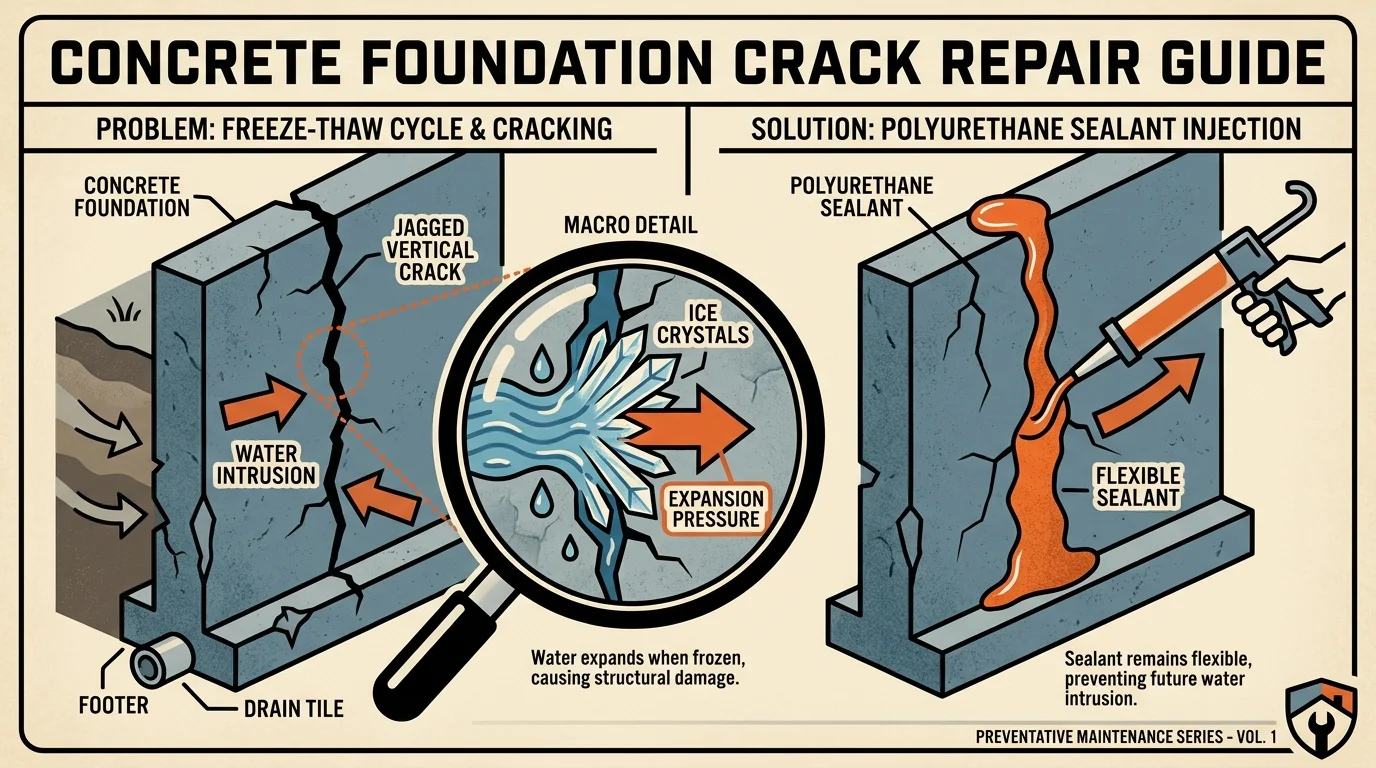
Sealing Foundation Cracks Before Freezing Weather
Walk around the exterior of your home and inspect the concrete foundation. Small, vertical hairline cracks are typical signs of a house settling, but they require attention before winter arrives. If left open, autumn rains will fill these tiny fissures. Once temperatures plummet, the trapped water freezes and expands, widening the crack. Repeating this freeze-thaw cycle over several years turns a cosmetic hairline fracture into a severe structural vulnerability.
Before the first freeze, use a wire brush to clean out any loose debris from the cracks. Fill them with an exterior-grade masonry caulk or a specialized epoxy injection kit. If you notice large horizontal cracks, stair-step cracks in brick mortar, or sections of the foundation wall bowing inward, do not attempt a DIY patch. These indicate active structural failure and require immediate evaluation by a licensed structural engineer.

DIY vs. Hiring a Pro
Knowing your limits is a crucial part of responsible homeownership. While YouTube tutorials empower us to tackle new projects, some repairs carry risks that outweigh the savings. Use this matrix to determine whether to grab your tool belt or your phone.
| Maintenance Task | DIY Difficulty | When to Call a Pro | Potential Savings by Repairing Early |
|---|---|---|---|
| Re-caulking tubs and showers | Beginner | If tile is falling off or the wall feels spongy (indicates deep rot). | $1,500 – $4,000 (Subfloor/joist repair) |
| Replacing a toilet flapper | Beginner | If the toilet rocks at the base or leaks from the wax ring beneath the floor. | $200 – $500 (Annual water waste) |
| Clearing gutters & downspouts | Intermediate | If your home is over two stories high or requires roof-walking. | $5,000 – $15,000 (Foundation repair) |
| Patching a roof shingle | Intermediate | If the roof is steeply pitched, or decking is visibly sagging. | $2,000 – $8,000 (Mold & drywall damage) |
| Electrical/HVAC motor repair | Advanced | Always call a pro for internal wiring or refrigerant handling. | $1,000 – $3,000 (System replacement) |
Care Killers: Mistakes That Accelerate Home Damage
Sometimes our best intentions cause more harm than good. When maintaining your property, avoid these common “care killers” that actually accelerate deterioration:
- Using the wrong caulk: Applying acrylic latex caulk in a shower or tub will fail rapidly. Always use 100-percent silicone for wet areas and exterior windows.
- Power-washing roofing shingles: Never use a high-pressure washer on an asphalt roof to remove moss. The pressure strips away the protective granules, ruining the shingle’s UV protection and halving the roof’s lifespan.
- Ignoring indoor humidity: If your windows constantly sweat on the inside during winter, your indoor humidity is too high. This promotes mold growth behind furniture and damages window sills. Run exhaust fans during showers and cooking.
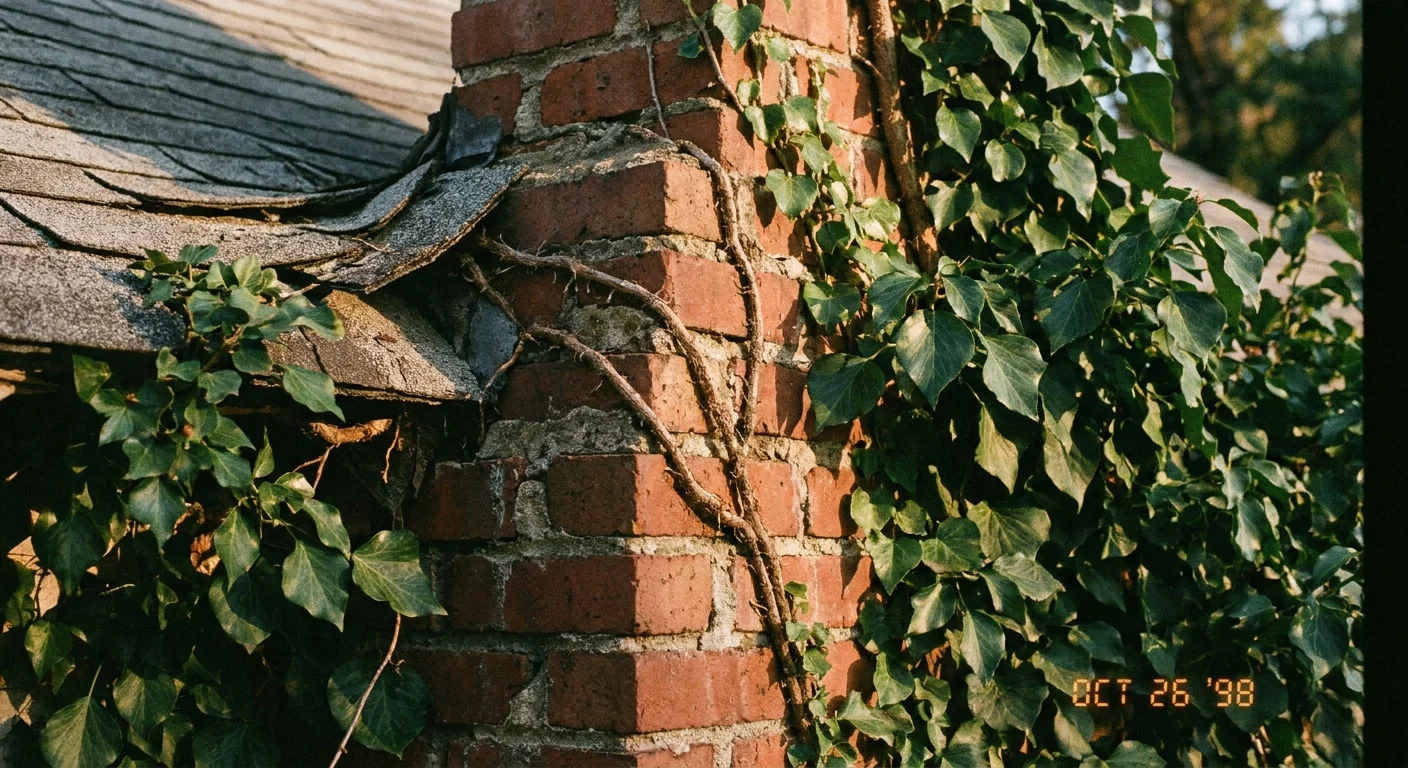
- Planting too close to the foundation: While we champion lush gardens, planting large shrubs directly against your siding prevents airflow, traps moisture against the wood, and provides a highway for termites to enter your home. Leave an 18-inch gap between foliage and your exterior walls.
“A garden is a grand teacher. It teaches patience and careful watchfulness; it teaches industry and thrift.” — Gertrude Jekyll
Jekyll’s wisdom applies beautifully to the broader scope of home care. Careful watchfulness over your property’s minor faults translates directly into industry and thrift—saving you thousands of dollars through proactive, thoughtful maintenance.
Frequently Asked Questions
How often should I inspect my home for maintenance issues?
Conduct a thorough walk-through twice a year, ideally in the spring and fall. Look specifically for water damage, exterior cracks, and roof wear before extreme weather seasons begin.
What is the easiest home repair that saves the most money?
Re-caulking wet areas and windows. A ten-dollar tube of silicone prevents thousands of dollars in water damage, mold remediation, and energy loss.
Is it safe to clean my own gutters?
Yes, provided you practice strict ladder safety. Always use a sturdy ladder equipped with a standoff stabilizer, never overreach, and ensure the ladder is placed on firm, level ground. If you are uncomfortable with heights, hiring a local service is a worthwhile investment.
When is a foundation crack a serious problem?
Vertical hairline cracks are generally normal settling. However, horizontal cracks, cracks wider than a quarter-inch, or stair-step cracks through brick mortar signal dangerous structural movement and require professional evaluation.
Taking care of your house ensures it will continue taking care of you. Walk through your rooms this weekend with a critical eye, a fresh tube of caulk, and a notebook. By handling the minor drips, drafts, and cracks today, you secure your comfort and your savings for the years ahead.
Plant care requirements vary by climate, soil, and growing conditions. Always confirm plant toxicity with your veterinarian if you have pets or young children. Follow all manufacturer safety guidelines when operating tools, climbing ladders, or handling chemical sealants.