How much do you know about your Keurig?
Since it first launched its single-serve brewers in 1998, Keurig has grown to be a goliath in the coffee industry. The technology was first developed to get rid of that nasty communal coffee pot in office break rooms.
But for the past couple of decades, the American public has kept a Keurig on kitchen counters all across the nation to make that delicious morning cup of Joe more convenient. Industry researchers estimate that there are probably more than 25 million Keurig machines used across the US.
And while models vary, these brewers contain numerous components that make your morning routine more convenient. Parts like the filter discard bin and drip tray avoid unnecessary messes and spills, but the machine isn’t advanced enough to clean itself. And the sad reality is that your Keurig is a hotbed for bacteria and mold.
The regular exposure to moisture makes almost every piece of your Keurig sensitive to germs. Thankfully, though, you can prevent these particles from entering your coffee cup with some proper cleaning and maintenance. We talked to the experts about everything you need to know about keeping your Keurig clean.
Because each part works differently, they don’t always follow the same cleaning schedule. So, The Home Team has gotten to the bottom of it! Here’s everything you need to know about cleaning your Keurig, and we’ve even included the best cleaning products to use according to the pros!… Is YOUR Keurig a hotbed for germs?
What should you be cleaning once a week?
Make sure you clean all the removable parts of your single-serve coffee brewer each week. This includes, but isn’t limited to: the water reservoir, the drip tray, the lid, and the K-Cup holder. The most common place you’ll see mold grow is in the drip tray because extra water sits in there, and people usually forget to clean it.
Mold can also grow inside the machine itself. According to experts, this is less likely and generally happens when the machine is filled with water and unused for extended periods. But the good news is that you can easily clean the removable parts of your Keurig with a sponge and some warm, soapy water.
Almost all the pieces can be dried with a dish towel, but just make sure to air dry the inside of your water tank to avoid any lint from getting into your next cup of coffee. And while you’re at it, there’s another step you can take to keep your machine squeaky clean.
Keurig offers rinse pods that you can use to clear out any lingering flavors and residue. This is particularly useful if you alternate between different kinds of K-Cups.
What should you be cleaning every 2 months?
After a bit of time passes, the water filter in your reservoir becomes less effective, which can give your coffee an unpleasant and stale taste. Cleaning experts recommend replacing the filter cartridge about every 2 months. This process is, thankfully, fairly simple. First, you have to withdraw and throw away the old filter.
Then, clean and dry your filter holder using a sponge and some soapy, warm water. Then, you’re ready to place your new filter inside. But be aware: All new filters need some prep before you use them for the first time.
Manufacturers recommend soaking the filters in clean water for about five minutes, then rinsing them under the sink for another minute or so. Then, you need to snap it into the holder, and you’re all set to go!
What should you be cleaning every 3 to 6 months
The inside of your coffee machine requires maintenance the least often, but it’s not something you should ignore entirely. Hard water build-up is what clogs up these machines the most. Even with filtered water, calcium deposits slowly develop all over the inside of your trusted Keurig.
And even though this doesn’t present a serious health concern like bacteria and mold, this build-up can severely impact how effectively your machine works. Depending on how many cups of coffee you make on a regular basis, you’ll have to descale your machine somewhere around 2-4 times a year.
Keurig sells a descaling solution online, but cleaning experts say that distilled white vinegar works just as well. The descaling process can vary depending on your model. So make sure you read the instructions on Keurig’s website for when your machine is due for a tune-up.
… So, now that we’ve covered the main points, let’s talk about how to properly clean your Keurig!
How to properly clean the drip tray
When: Weekly, if used every day. This is something that’s recommended but not required.
How:
-Remove and empty your drip tray.
-Wash it in warm and soapy water.
-Dry it with a clean and soft cloth.
How to clean the water reservoir
When: Weekly if used daily. Again, this is recommended but not required.
How:
-Remove the reservoir from your coffee machine.
-Remove the lid and empty the reservoir of any excess water.
-Wash the inside of the reservoir using soapy, warm water and a soft, clean cloth. Note: NEVER wipe the inside of a reservoir with a dry cloth. Lint and any other particles might cling to the sides of the reservoir and ultimately end up in your drink.
-Rinse well and only dry the outside of the reservoir.
-Before using it again, place the reservoir back and run two hot water cleansing brews. Your machine’s “Use & Care Guide” should have more information on cleansing brews.
How to clean the pod holder
When: Weekly, if used daily. This is also highly recommended but not required.
How:
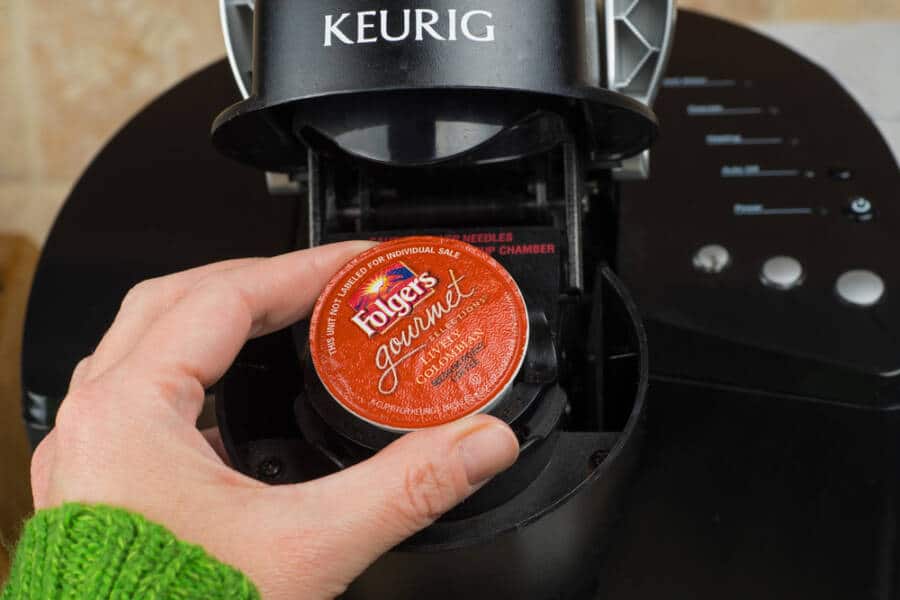
-To remove the pod holder from your Keurig coffee maker, follow the instructions for your type. Be careful of the needle, which is used to puncture the pod.
-Only rinse using warm water. Do not dry.
-Place it back and run two hot water cleansing brews before using again.
How to descale a Keurig
Note: Descaling means removing calcium, magnesium, limestone deposits, and other minerals formed in a coffee maker. These mineral deposits aren’t toxic. But if they’re not cleaned every once in a while from your coffee maker, they can worsen its performance and affect the taste of your coffee.
That’s why using bottled or filtered water is best. If your water has a high mineral content, you might need to perform the descaling process more frequently. Some models of the Keurig system will remind you when to descale with the warning “Time to descale the brewer!”
This reminder monitors the quantity of liquid that’s passed through the system and then prompts you to descale. If you postpone the process, the system will remind you again in a couple of weeks. The reminder will only go away once the system has been successfully completed.
When: Every 3 to 6 months or when day-to-day brewing becomes slower.
How: The process varies from model to model. So be sure to follow the manufacturer’s instructions.
The best cleaning products for your Keurig
Cleaning your Keurig doesn’t have to mean spending money on tons of products. All you need are some basics that you may even already have around the house:
-Microfiber Cloths: Remember to only use these on the exterior of your Keurig. The pros advise that wiping the interior with a dry cloth can leave unwanted particles.
-Mrs. Meyer’s Dish Soap: Dish soap suds up your Keurig well when it needs to be cleaned.
-Keurig Descaling Solution Kit: This cleaning kit makes it easy to clean and descale your Keurig for optimal upkeep and will keep your coffee tasting delish. The Keurig 3-Month Brewer Maintenance Kit can be found on Amazon and includes a descaling solution, water filter cartridges, and rinse pods.
We hope you found this article helpful. For more fantastic tips from The Home Team, we highly recommend you also read: 8 Genius Cleaning Tools That Save You Time